In React Js every component goes through a series of events, from its mounting on the node to its unmounting from the node, this is basically known as react lifecycle methods. If you sometimes get overwhelmed in understanding the working of the lifecycle method, then you are not alone!!
When I started learning React Js, the lifecycle method was one of the topics which always used to make me confused and I always used to wonder how should I implement it. The first lifecycle method I used, was constructor and componentdidmount, during my API call, later as I started working more deeply in react, Then I understood what is the actual benefit of these lifecycles and how these methods make our life easier ?!
So let’s understand these methods and how we can use them in our React js projects.
What is React Lifecycle Methods?
React lifecycle methods refers to the life span of the component. It basically means when you or a user run an app or website, components get mounted on DOM, render, updated, or updated again due to user actions or event set on that component, and finally unmounted from the DOM. All these updates of each component are beautifully handled by Virtual DOM.
The lifecycle of components is basically divided into three-stage, birth, development, and death.
- Mount – component gets initialized and rendered on DOM
- Update – components get updated due to state or props and rendered with updated state
- Unmount – finally, the component gets removed from the DOM
Now lets jump into understanding all these three-phase, one by one,

And yes there is one less popular phase known as the Error Handling phase, whenever there is an error during execution, and components don’t get render, then it goes to this phase. And once the bug is removed, components again get back to their normal 3 stage life phase.
Phase 1: Mount
Mount phase is the time period when components are parsed and attached to the DOM nodes. It consists of basically 4 stages, all stages mentioned below are in chronological order,
- constructor()
- getDerivedStateFromProps()
- render()
- componentDidMount()
constructor()
This is the first method that is called before anything else in the react component lifecycle, It is called before the component is mounted to DOM. You can assume it as a starting point of the race track, where every component is made ready to stand aligned, before starting the race ?.
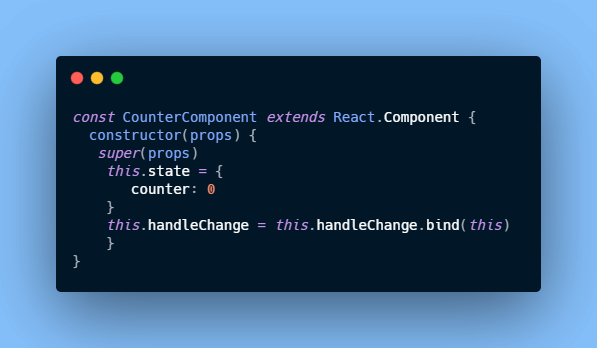
We usually, initialize the state and bind the event handlers method inside it. super() is also used inside the constructor method in order to use ‘this‘, if we do console.log(this) inside constructor without super(), it will throw undefined. We have to keep in mind that, CounterComponent is borrowing functionality from React.Component. The base class has its own constructor with its own codes, to run our component, when we defined the constructor method, we basically overriding it inside the React.component.
And the only reason when one needs to pass props through the super method is when you need to access this.props inside the constructor.
Also read, How Does React Js works | Detail Explanation on Virtual DOM
static getDerivedStateFromProps()
This is one of the new lifecycle methods recently introduced by React, which get called just before render() method. It is one of the rarely used methods but comes very handy in certain situations.
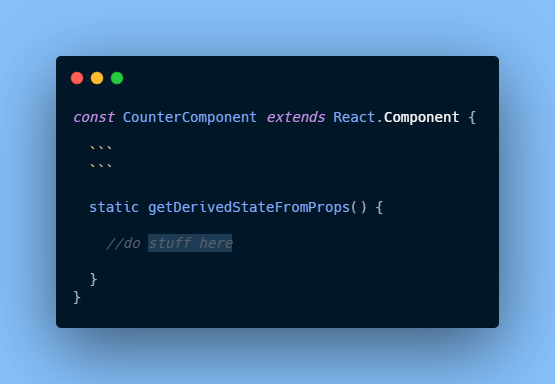
We can also say that it is a kind of safer option than the previous lifecycle method known as componentWillReceiveProps(). This method is used to update the state if the state depends on the prop change. If there is no change in state, then this method returns the null value. Note, this is a static method that does not have any access to this keyword. Let us understand it with an example to get a clear view,
This method takes state and props as a parameter,
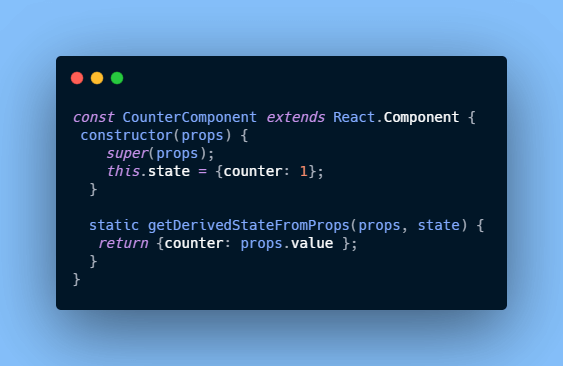
It will return an object to update the state, or if the props.value is equal to state.counter then it will return null value.
render()
Render method is one of the most used lifecycle method, which is used to render your component into DOM, it is called multiple times during the mount and update phase. This method is only available inside the class component. It returns JSX to render your UI and returns null value if there is nothing to render inside the component.
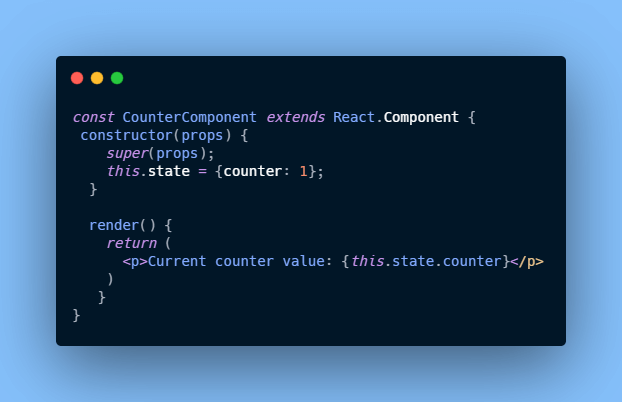
It is very important to understand that, we should always keep the render method in a pure state, which basically means that we should not update or use setState inside the render function, as when the state gets updated, the render method gets automatically called, which could lead to infinite looping.
componentDidMount()
It is one of the most important lifecycles methods in the mount phase, which is called just after the component gets mounted on the DOM. componentDidMount() is the best place to invoke network calls (API) if you need to update the data from a remote server. Unlike other previous methods, React allows users to use setState method to update the state. When the state gets updated inside this method, it causes another rendering but just before the browser updates the UI.
Let us look at an example,
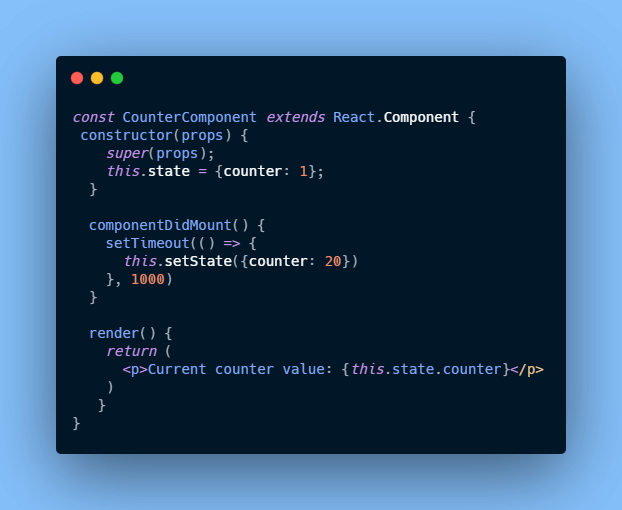
But then you might wonder, then what is the difference between componentDidMount() and componentWillMount(), so let us look here,
componentDidMount vs componentWillMount
It took me a long time to understand the actual difference between these two methods, When you start learning to React js, at that point both the methods might seems similar but there is a significant difference in working of these methods. So let us understand the working of these methods,
componentWillMount()
componentWillMount() is a rarely used method that recently got deprecated from the React js bundle in 2018. But you can still use it (until React js 17.0) and this function is not made to use any async functions inside it, but if you still want to use async call inside this method then you have to use UNSAFE_componentWillMount().
The reason why it is not recommended to use async functions inside it because using fetch call inside it causes components to render with empty data at first, so you need to design the UI in such a way that it looks presentable even without data. As we know in JavaScript, events are asynchronous, so when you make an API call, it does not wait for that method to execute instead it continues to execute other methods, while the API call method is running behind the scene, which leads to it to rendering components continuously.
componentDidMount()
On the other hand, as stated above, componentDidMount is one of the most used lifecycle methods and the best place to fetch API data. It updates the UI without having the user refresh the page.
One more important difference here we have to note that, during server-side-rendering (SSR), componentWillMount() will be called twice, once from the server-side and once from the client-side, while in componentDidMount() , it will make sure to fetch data only from the client-side.
Also read, Girls: Six Reasons the Coding World Needs You
Phase 2: Update
This is the second stage of the lifecycle, where your component is already mounted on DOM, and any changes to state or component are handled in this phase. Note, this phase too shares some of the lifecycles methods of mount phase, like getDerivedStateFromProps() and render() methods.
In order to make this article not too long, I am not going to explain the working of these methods any further because the working of these methods is similar to the working in the mount phase.
- getDerivedStateFromProps()
- shouldComponentUpdate()
- render()
- getSnapshotBeforeUpdate()
- componentDidUpdate()
shouldComponentUpdate()
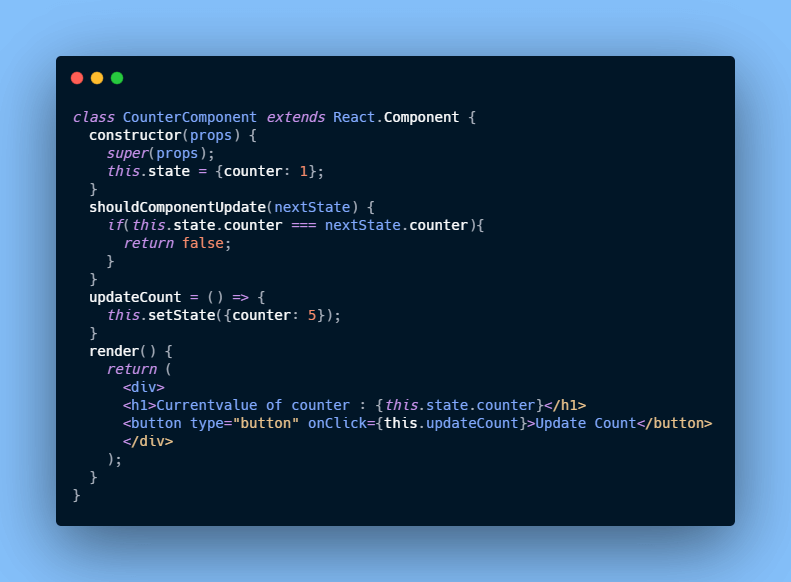
This method is called as soon as static getDerivedStateFromProps() the method is invoked. It becomes very handy when you don’t want to render when any state or props change.
Whenever useState() is called, Reacts automatically renders the component, so using this method React gives you the full advantage, so that you can decide whether you want to render your component for any particular change in state or props. It returns the boolean value true or false if you want to re-render or not. Let us understand with an example,
getSnapshotBeforeUpdate()
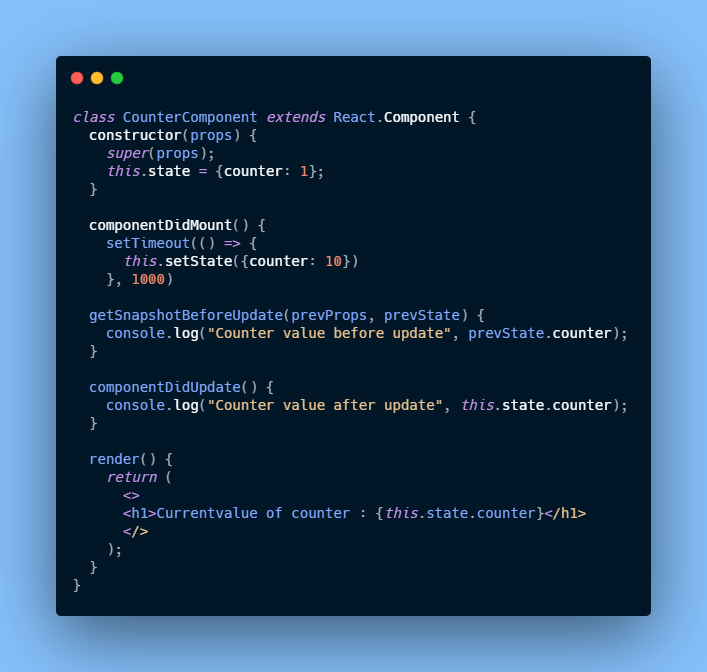
Just after the render() method, this method is invoked. getSnapshotBeforeUpdate() might not be used much frequently but it sometimes comes in handy in a certain special scenario.
This method records the previous states or props just before it gets updated, and then can be passed down to componentDidUpdate(). Keep in mind to use componentDidUpdate() always with getSnapshotBeforeUpdate() to avoid any error.
componentDidUpdate()
This is the last method of the update phase which gets called after the components get updated in the DOM. It is similar to componentDidMount() like you can use setState() or fetch API call but you have to mention a condition to check that if the previous state or props has changed or not.
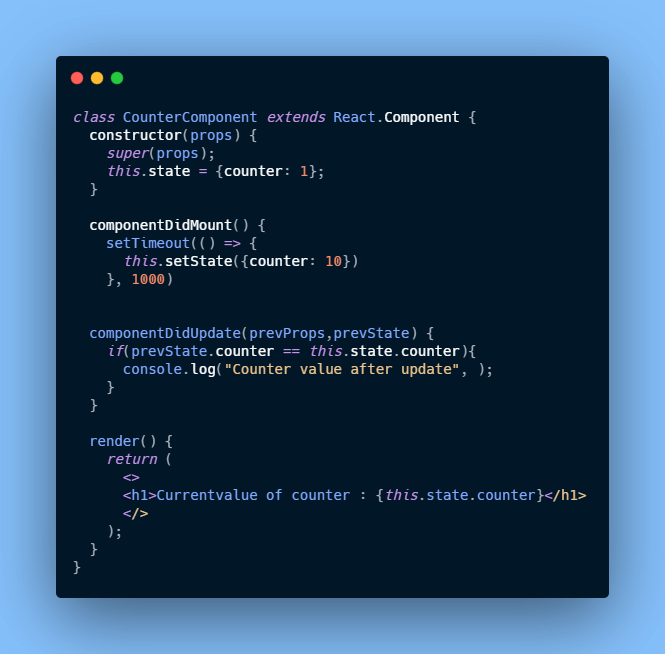
Note, It is necessary to include both prevProps and prevState in the componentDidUpdate() function as a parameter, because If you do not mention both, then might it leads to multiple API calls if you are fetching any data.
Also read, How does JavaScript works ? A detail explanation of JavaScript’s Engine Working
Phase 3: Unmount
This is the last stage of the React method lifecycle, in this stage components get removed from DOM. React has only one method for this, so let us understand it,
componentWillUnmount()
This is the single built-in method used in the unmount phase, If you need to do any cleanup actions, then it is the right place to do it here.
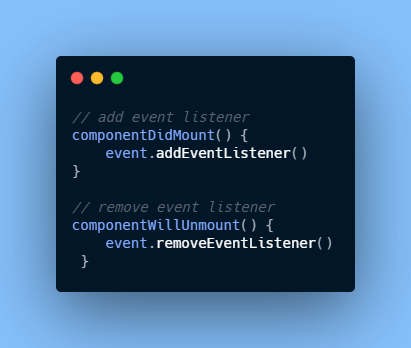
There are more lifecycle methods, but I am not mentioning them here, as the article might get a little long, to summarise the whole process, let us look at the diagram mentioned in the official React Documentation,
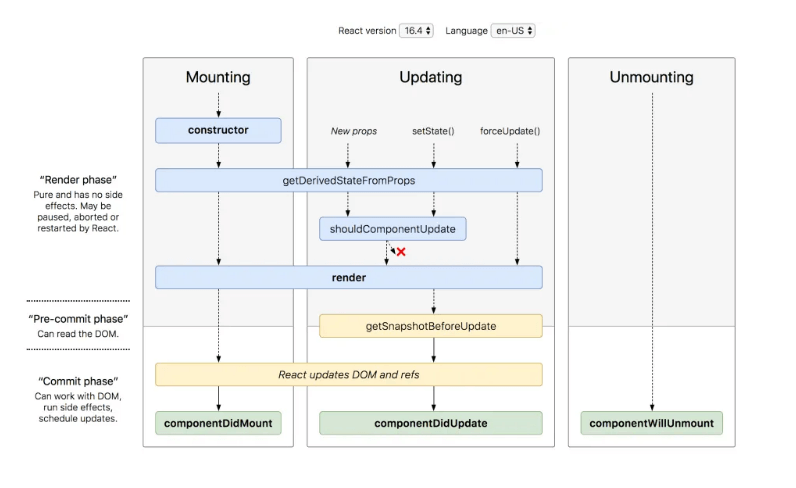
React Lifecycle Methods in Hooks
With the addition of hooks, now it becomes very easy to use lifecycle methods in functional component too, let us understand how we can use these methods inside our functional components.
React has added a special type of hook, which performs all type of react lifecycle methods, by modifying its input, This hook is known as useEffect(). To use this hook, first you need to import it by,
import { useEffect } from "react";
Now in our component, we call useEffect hook,
useEffect(() => {
  // Inside this callback function we perform life cycle methods.
});
So using this hook we can perform, basically all our major methods, let us dive into it more,
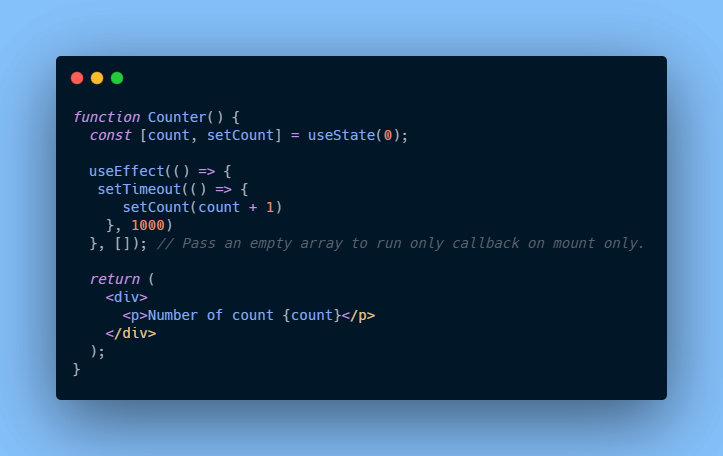
componentDidMount()
So we can easily perform the componentDidMount method using useState, let us understand with an example,
componentDidUpdate()
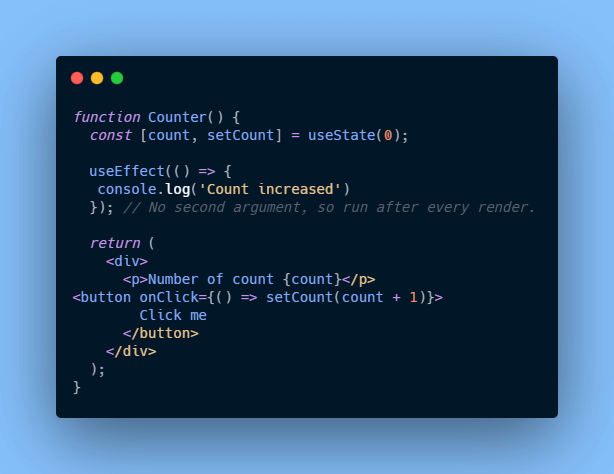
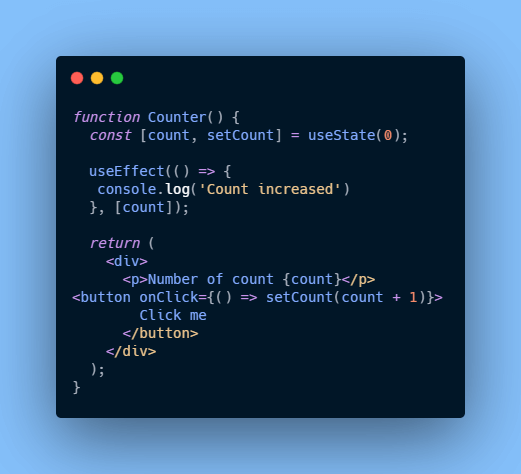
We can also perform componentDidUpdate method in two ways, lets first see an example,
-
Call hooks after every render
-
Call hooks after specific dependencies are changed
so whenever that dependency changes, React re-renders the components,
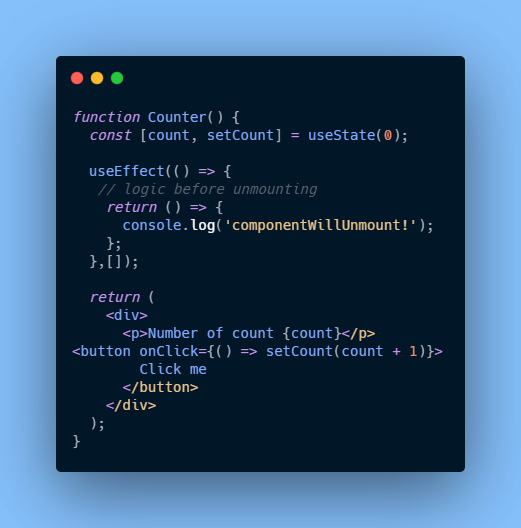
componentWillUnmount()
As the name suggests, this method is called when the component is unmounted and it is called only once in the component’s lifecycle.
There are also some lifecycle methods that do not have hook replacement according to React documentation,
- componentDidCatch ( )
- getSnapshotBeforeUpdate( )
- getDerivedStateFromError ( )
Also read, How to select only one element of a map() in React
Final Word
I hope you like my article and working with all these methods, It may seem a little overwhelming at first but as you work with these methods, you will able to understand how these methods are a lifesaver and help react to make complex UI.
Do let me know how you like the article in the comment section, or hit me up in my mail. And please bookmark this website to get more articles like these, and don’t forget to share this article too ?.

Leave a Reply